Wow! I can’t believe this course is already over! I feel like I’ve learned so much in such a short time.
Throughout this course, I tried to be active on all of the platforms, however, I found that I ended up being more active on Twitter and commenting on blogs. While I was initially quite hesitant to join Twitter, I ended up really enjoying the communities it created. I particularly enjoyed the chats, as I was able to connect with other educators and have some of my questions about teaching answered. I did have some problems joining them initially, mostly due to miscalculating the time, but I was eventually able to participate in several different chats throughout the semester. I found a couple of chats that I especially enjoyed, such as #EdAdventures lead by @sydneykoch_. This chat had the goal of connecting novice and veteran teachers, which really contributed to the content that was able to be shared. I was able to connect with numerous teachers from all around the world through this chat. I also really enjoyed the #822chat and #tlap chats, though I wasn’t able to join as often (due to them finishing for the summer or taking a few weeks off). I look forward to being able to join the #saskedchat now that class is no longer happening at the same time.
I used Twitter a lot to share the resources I found and articles I read that were relevant to education in general or to what we were learning in class. I hope to be able to return to my tweets (and that others can as well) when I need inspiration for lesson plans, assessment strategies, field trip ideas, and for everything else I posted about. I also made an effort to reply to at least two of my classmate’s (or other’s) tweets per day, though I often read a lot more than those two. If anyone responded to one of my tweets, I would reply, trying to further the discussion.
I made a goal to comment at least once on everyone’s blog, which I was successful in doing! I even made it back to some multiple times. In my comments, I would ask any questions I had, but usually ended up providing encouragement. I found that I learned a lot from spending time reading my classmate’s posts, as they often tried something that I hadn’t thought of, or provoked me to think in a new way. This really reminded me of how closely intertwined teaching and learning are – when I was trying to contribute to other’s learning, I often ended up learning something myself. I originally was keeping the screenshots on my computer, however, I had a mishap and lost the first two weeks’ worth of information. After that, I started compiling my comments (as well as some of my replies on Slack) here, so that they would be safe no matter what happened to my laptop. I also made sure to read everyone’s comments on my own blog, and responded to any questions they had.
For my learning project, I decided to teach myself how to paint with acrylics. While I have some experience using watercolors, I wanted to branch out in what I was able to do and try something new.
For my first week, I chose what I would do for my project. I used my old acrylic paintings and my recent watercolors to establish a baseline, and decide how and what I wanted to learn.
To start off, I wanted to learn how to paint clouds, as they are often the focal point of a painting. I also chose to do them first, since they would be the most different from watercolor painting, where you simply leave parts of the paper white. I decided to try multiple techniques before moving on to my actual painting in order to get a feel for it.
Painting Clouds in Acrylics lesson – A very simple tutorial that creates fluffy, white clouds. However, the use of only white didn’t create the depth that I wanted.
How to Paint Clouds using Q Tip and Acrylics – I liked the effect created with the use of Q-tips, and how the addition of other colours changed the depth of the cloud. I hope to use this technique of painting in my future classrooms.
Tulip Field Acrylic Painting – The tutorial for the painting I did for the week. It introduced another technique (using sponges) that would be fun to use in the classroom.
During this week, I decided to challenge myself even further by starting a painting on a larger canvas (going out of my comfort zone of doing little paintings) and tried to do my own painting (without a specific tutorial). I learned multiple techniques for painting grass – some more detailed and some more impressionistic. I used Hyperlapse to document my progress. I also discovered a couple of apps that have helped me on my learning journey.
Acrylics Painting – An app that compiles YouTube painting tutorials and categorizes them. Helpful for beginners.
Sketch a Day – An app that connects artists acorss the globe. Users can post their own tutorials, as well as images of their paintings or drawings. There is a daily challenge that people can participate in.
Why I’m A Fan of the Fan Brush – A website run by artists that has painting tutorials and blog posts. In particular, I focused on using the fan brush in different ways to create grass.
Painting Masses, Not Grasses – This is how I ultimately decided to paint my grass for the week. He provides simple instructions with pictures to demonstrate.
Chuck Black – a very in-depth explanation about how to paint very detailed grass. I hoped to use this as inspiration for the grass in my large painting.
Next, I wanted to learn to paint water. However, I decided to take a more impressionistic approach after doing my research. I wanted to explore my old love of impressionist painters and felt that the impressionist way of painting water more accurately captured the movement. I learned how to use Windows Photos Movie Editor as well as Book Creator (link to my book here) to document my learning.
I watched some palette-knife painting tutorials to get some inspiration, including this Sunrise Painting tutorial. This site gave a little more detail about how to go about using this technique and why you may choose to do so.
This tutorial gave me the inspiration for colours and brush-techniques.
This site let me explore impressionist techniques a little more in-depth.
This week, I decided to focus more on finishing my large painting. I learned how to paint rocks, fur, and finished the grass I had started to work on. All of these steps helped me to learn how to paint light coming from a certain direction, and how to keep it consistent for multiple objects.
I tried to branch out in my PLN for my project, and ended up finding a few Twitter pages and people to follow (including @angelafineart and @Artsherpa), which has helped me to find new places for tutorials. I also learned how to use Gif-Maker this week, which helped me to show my learning in a new way.
Chuck Black and “Painting Masses, Not Grasses,” – I combined these two techniques in order to achieve a more detailed looking grass, while still maintaining a proper perspective for my painting. I did smaller, more detailed masses, painting each on individually, like in Chuck Black’s tutorial.
How to Paint Texture – I used this tutorial when I was painting the bisons’ fur.
How to Paint Rocks and Cliffs – this site helped me to paint the rocks so that the colours, lighting, and texture would all work together to create the proper effect.
I decided to take a completely different route this week and decided to try my hand at
(A finished image will be updated as soon as possible.)
portrait painting. It was a lot harder than expected, even by doing an abstract portrait, but taught me a lot about colour palettes, details, texture, and shadowing. I learned how to use Milanote to organize my resources, and LunaPic to edit my photo.
How to Paint a Realistic Portrait in 5 Steps – this is what I originally hoped to do, but didn’t feel ready to tackle something so realistic for my first attempt. I also didn’t have to proper materials to create the glazes. These resources helped me to better understand this one (as far as colours, techniques, and blending):
How to Paint Abstract Self Portraits for Beginners – This site helped to walk me through the editing of my photo and the creation of my painting. While I didn’t use their paint-by-number option, it would be a fun activity for people wanting to learn to paint on their own.
My Biggest Takeaways About Online Learning:
I can do it. For years, I have avoided online classes because I didn’t think I would be able to learn as well without in-person instruction. However, I’ve learnt that I can learn online, even without an online course sending me information about what I need to learn. There is so much information available online that I can literally teach myself to do anything I want to. I just have to be willing to take the time to find good resources to teach me, and then put in the effort.
Technology and social media don’t have to be scary. Learning to use them properly, and for things I enjoy and am passionate about (such as teaching and painting), can help me to make connections with people who have similar interests, allowing us to learn from each other.
The importance of self-directed learning. I would never have been able to learn what I did in a classroom, even if I took an art or painting class. Having the freedom to choose what I wanted to learn, when I wanted to learn it, and how I would show what I learned made me more invested in what I was learning. Giving students the same freedom – such as with a Genius Hour Project – will allow them the same joy from learning. Even if I try to incorporate every student’s interests in my lessons, they may not enjoy it as much as a self-directed project, where they have control over all the variables.
While I still prefer in-person classes for instruction for a plethora of reasons (staring at a screen just isn’t the same), I have learned a lot about online instruction and appreciate it a lot more than I used to. There is a lot to be gained from this type of learning, some of which aren’t as possible in a physical classroom environment.
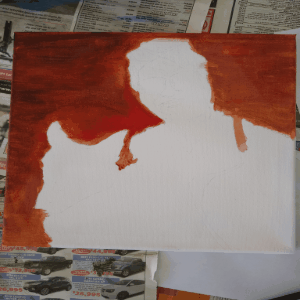
To start this week off, I wasn’t sure what to paint. Nothing was really standing out to me, and the creative part of my brain seemed to be burnt out. My boyfriend then suggested that I try doing a portrait, to change things up a bit from all of the landscapes, and volunteered to be the model for my painting.
I wasn’t completely on board at first, mostly because people are hard to draw, nonetheless paint, and I didn’t think I had the skill necessary to be able to do it properly. But, it also seemed like a fun challenge, one that if I was successful, would be amazing, and if I failed, would be hilarious to see. So, I started doing some research on how to go about painting a person.
I wanted to find a new way of presenting my research, rather than just a bunch of hyperlinks in a blog post, and had stumbled across Milanote last week. It seemed like a creative, yet organized way of organizing sources alongside personal thoughts and comments, so I figured I’d try it out this week. You can see my Milanote here.
It was overall very easy to use, after playing around with some of the options. They have tons of pre-made templates for oodles of different situations, or you can start from scratch (which I did, just to have more freedom in trying out different settings). They use a simple drag and drop function for adding in new texts boxes or columns, and divide up your information based on what it is (if using the column feature). You can change colours, add hyperlinks, embed links or photos, as well as other features I didn’t get around to trying quite yet.
In the future, I will probably use it both personally and professionally – personally for organizing my plans for writing, and professionally in the classroom. Milanote would make it super easy for students to brainstorm and do collaborative research together, without their work interfering with each others (as is sometimes the problem with Google Docs).
In the Milanote, I mentioned using LunaPic as my photo-editor. I had previously only used PicMonkey, and had planned on doing so again. However, I discovered that they no longer have any free options, which turned out to be kismet. LunaPic was completely free, for all of their options (at least as far as I could tell), and they had dozens of pre-made settings that mimic famous painters or styles, allowing me to come up with a much more polished piece than I would have been able to with PicMonkey. I loved how diverse each of the options were, and that you could adjust how heavily the effects were applied (make sure you hit adjust after doing so if you want to save the image with the lowered effect – otherwise it will download with it at 100%).
I actually really like the “floating” effect (above), but didn’t find it till after doing the painting, when I was doing the demonstration for this post. We decided to use the below image for my starting point (using the LunaPic Dreaming effect):
In order to transfer the image to my canvas (I wasn’t quite comfortable trying to free-hand it), I scribbled over the back of a printed out version with a pencil, then traced the lines while the scribbled portion was over the canvas, allowing me to transfer a rough outline.
Finally, I decided to use GIF Maker (like in my last post) again to show the process. I feel that it is a succinct, yet polished way of compiling images into a slideshow.
I wasn’t quite able to finish the painting in time for this week’s post, despite spending more time on it than each of my previous paintings (other than the large one). I found it was a lot more complicated and time consuming to paint a portrait than a landscape – there is almost no room for error, and every little detail matters, or else the entire appearance is off. I think part of what made it even harder were the colours. Where I could have had a few varying tones of the same colour in a regular portrait, I had to constantly be mixing different shades and colours, then apply them just so or risk ruining the effect. In addition, I found that I could only do hour-long sittings, as the number and brightness of the colours got confusing if I looked at them for too long, making me have to take more frequent breaks.
I also noticed that GIF Maker seemed to have squashed the photos, and couldn’t get it to undo that effect, so here’s a photo of what I was able to accomplish thus far:
While I enjoyed the different colour palette and the new challenge, I have a lot more to learn before I feel comfortable doing something similar again.
Once I finish the painting, I’ll update this post with the finished image.
As always, if you have any tips, tricks, questions or otherwise, feel free to do so in the comments! I look forward to hearing from all of you.
At long last, I finished! It took a lot longer than expected and was much more finicky. However, I am very pleased with the final product!
When I first found out that we had to practice using a coding site, I was a little (okay, a lot) nervous. While I’ve definitely improved my technical skills and am more comfortable using some slightly more advanced tools, coding was never something I thought I would try. How on earth could I even begin to understand what I was supposed to be doing? How could I understand the little pieces of code and how to use them when I couldn’t figure out half of the easy-to-use and ready-to-go applications?
However, I didn’t realize just how easy it could be. There are now tons of sites and apps geared towards teaching kids how to code. While I had heard of things like Scratch, I had never actually looked into them too much, and I never dreamed I would actually be able to do anything with them. I also didn’t know there was a thing called block-based coding to help teach some of the fundamentals before moving into more detailed and technical coding. I was amazed at how easy this made things.
I decided to do my coding experience this week on Hour of Code, since I had absolutely no experience and wanted a more step-by-step walk-through. I chose to do the Flappy Bird learning experience. Below is a screencast of my first attempts:
It was super simple once I understood what I was supposed to do. I played around more on the first level, just to get a feel for it. I really liked that they gave the option on the last level to do your own creation:
I realized after, however, that I had forgotten to put in any obstacles (oops). Live and learn. As you can see, they have a lot of options, and lots of room for creativity, even in the more structured lessons. I did wish it would have let me go back and redo that level, just to try out some more options, but I guess that’s where tools like Scratch come in, which are less guided and more trial and error.
Even though I didn’t have any experience prior to today, my little brother took a robotics camp over the summer where they used Scratch to learn about coding. He has continued to use it, and it has helped him significantly in math – he used to struggle with following a specific order when doing things. Coding helped him to understand the necessity of sequencing things in a certain way, but that isn’t the only perk of learning to code.
However, if you’re like me, you might be struggling with where to get started, especially if you have no experience in coding. This site provides some kid-friendly resources that would be easy to implement in the classroom, with options for both hands-on and solely computer-based learning experiences. This site (and this one) provide some useful tips for getting started.
I also really like that there are a bunch of activities that teach coding without using a computer. This allows you to scaffold student’s learning more directly by seeing what it is they struggle with as they are encountering it, something that is easy to miss when each student is logged on and doing their own activity. Having this time for in-person interaction gives you a better sense of where students are at and allows you to more easily participate in their learning.
My family regularly says “fake news” as a joke when someone tells them something they don’t want to hear. For example, telling my little brother that he’s had enough screen time is promptly followed by an exclamation of “fake news!” even as he begins to shut everything off. He knows it is, in fact, true. The prominence of this phrase in the media, its overuseage, and the hilarity of some of the fake news out there has made it somewhat of a joke to us.
However, “fake news” is not a joke, especially when many take them as truth, and it’s getting harder and harder to distinguish the lies from the truth. I failed this quiz about
finding the fake headlines. Some of the headlines are absurd, yet some are more reasonable than the real news headlines, making it almost impossible to sort out the fake ones without having an extensive background knowledge of all the scientific advancements, political scandals, global achievements, and other, extremely specific knowledge of what’s happening in the world. This made me question whether I could even teach my students about digital literacy, when I was obviously extremely lacking.
However, I had to remind myself that I had the headlines completely out of context. I didn’t have the articles in front of me, and thus, could not evaluate their credibility, which is the foundation of digital literacy.
Providing our students with the skills necessary to stay safe online is not only vitally important, it can also be seen as a part of the curriculum. As a student in the elementary education program, I focused specifically in the Kindergarten through Grade Five outcomes, but teaching digital literacy can be seen throughout, especially in the older years. It ties into multiple subject areas, however especially into the second Comprehend and Respond outcome for all grades (CR_.2), allowing us to gradually build on their understandings by introducing new things to look for when evaluating sources. The indicators for this outcome (pulling from every grade level) mentions things like being able to distinguish between fact and opinion; discuss purpose, perspectives, and biases; understanding the use of visuals to focus attention of specific events or details to influence opinion; identifying intent of media; describing messages that are promoted in different forms of media; distinguishing between advertisements and authentic programs; recognize how feelings are portrayed; and constructing meaning. As you can see, digital literacy is a huge part of the Saskatchewan ELA curriculum. (For more information, see: Kindergarten, Grade One, Grade Two, Grade Three, Grade Four, and Grade Five curriculum outcomes.)
To begin these discussions with younger students, we can use storybooks as an introduction to distinguishing between real and fantasy. By doing so, we are ensuring that students understand the concepts of real and unreal, before trying to move to real-world, and often more complicated issues.
Putting up posters around the classroom as reminders to evaluate their sources is another good way to start. To deepen their understanding though, you could make a poster as a class, listing some steps to take and things to watch out for. Doing this allows students to engage with the steps at the base level, before applying them, making it more likely that they’ll remember to use them.
If we want our students to develop this competency, we have to give them opportunities to do so. Rather than only providing trustworthy sources during class, provide a wide variety of resources (both on and off-line) for students to engage with. Give them a chance to read and ingest the information, and allow them to critique it on their own or in small groups, before facilitating classroom discussions that look to evaluate the authenticity of the resource, what messages it conveys, whether it helps or harms people, and who is writing it and for what purpose (there is so much more that can be discussed as well, these are just some general questions to get started). By allowing them to regularly engage with both real and fake articles, they will start to see the difference, and how difficult it sometimes is to spot the fake news. Because misleading information is constantly evolving in its ability to look real, making it even harder to spot, we need to make sure students are capable of questioning what they are being told and are critical of everything they read.
Similarly, we need to show students how to evaluate their own biases and beliefs, and how this effects their likelihood to trust something. A huge factor in whether we think something is a fact or an opinion is our own beliefs – if it doesn’t agree with our own philosophy, we are more likely to say it’s incorrect or subjective, and possibly outright refuse to believe any new information that is provided. Showing students their own biases or how the news they get is filtered in concrete ways can be a huge help. Using PolitEcho, have students critique their FaceBook news feed, and show them how what they like and who they follow shapes what they are shown. Since I don’t use FaceBook other than for messenger, there was no information about my news feed. However, it was interesting to see where my “friends” fell, and how this could shape my feed if I choose to be more active in the future.
Teaching students to use certain tools (such as Politifact, Snopes, FactCheck.org, and Sweet Search) can help them to sort out the real news from the misleading or fake news. I used Sweet Search, and then Googled the same thing after, to see how different the results would actually be. While there were definitely some similarities, Sweet Search seemed to focus more on the news articles, and less on symptoms or certain political leaders speeches about COVID-19. It also didn’t have all the warnings and alert messages about the topic. While these may be useful in some situations, students who are trying to research a current event, or who are trying to find facts to combat their fear surrounding an issue, may find that Sweet Search provides fewer distractions. Moreover, I chose to search something that is huge right now, which means that there is a concerted effort by Google to provide more reliable information for the top results. If I had chosen something less current, and less popular, I may have had less carefully filtered results.
While I focused on the ELA curricular competencies that tie in with digital literacies, there are connections to every subject. Following the goals of the NCTE framework: “If we are to blend creative thinking and critical writing skills, students must be afforded opportunities to synthesize information they already have with knowledge acquired through higher education. Composition courses can provide this link.” Moving beyond ELA, students can apply the skills they have learned (about being critical of and evaluating sources) to other subject areas, such as Science, Math, Social Studies, and learning a language. Then, they can share the knowledge they have gained:
“An opportunity to practice communication of complex concepts that they encountered in their science and math courses. Using digital tools (e.g., Blackboard and mobile devices), students demonstrated their comprehension and interpretation skills through presentations, blogs, reports, and discussion forums…the emphasis shifted from passive communication to interactive research and delivery underscoring performative language…students learned that delivering inaccurate information is dangerous. It’s not enough to be connected; we need to be accurate in our knowledge through these connections” (Fournel & Khawaja, 2015).
This works with the curriculums goal of creating “cross-curricular competencies.” By using this approach and having students demonstrate what they have learned across multiple subject areas, we can be sure that they fully understand the importance of developing digital literacy, and will use what they have learned outside of the classroom as well.
Teaching digital literacy is not an option – not when the world of information, be it accurate or misleading, is only a couple of button clicks away. Teaching students to be critical thinkers and evaluate where they get their information from may seem impossible, what with the floods of misinformation and constantly evolving methods of distributing it, but it is necessary for their safety and well-being.
Our digital identities allow other people a glimpse of who we are, what our lives are like, what we’re interested in, and what our hopes and dreams are. While we can choose to not build a digital identity by not creating social media accounts, we will likely still have some form of an online identity. Odds are someone you know (or don’t know) will have shared a photo with you or something about you, be it on their own social media accounts, or as part of an online newspaper article. Even in those minuscule windows, people can still get a look at your life and what you’re interested in, who you’re friends with, and what you look like. We have virtually no privacy anymore.
And yet, these little glimpses into each other’s lives that we have been given are just that: glimpses. We can show people as much or as little of our true selves as we want, or even have multiple different identities that we only share with certain people – much like how we act differently around different people in our physical lives as well. We can choose to only show the “highlight reel” of our lives, making us look much more exciting than we maybe are. As such, there is a vital need to develop the ability to distinguish what we are seeing as a filtered version of reality. This gives people unrealistic expectations for their own life, which, when it doesn’t match up, can have dire consequences. We need to be more honest in what we post, showing both the good and the bad, the exciting and the mundane. Rather than only showing a few people on a private account, opening up about our struggles (at least a little) would help others who are going through the same or similar things not feel so alone.
I think we have all felt that momentary concern as we hand our phone over to someone else to show them something – “What if they see part of my other identity? What if they hate me?” We worry that they won’t accept us or that they’ll judge us for our personality, interests, friend choices, and other aspects of our identity that we don’t typically share with them.
As future educators, we need to realize that we are only seeing one part of our students’ identities – both of their in-person and online versions – and need to make an effort to be there for them. They may feel that they can’t share part of their lives with us, but need to talk to someone about what they are going through. Creating a safe classroom is only part of the answer to this problem. We also need to make sure that we create safe online spaces for them to talk – such as having a chatroom with the class, as well as with each, individual student. What they may not feel comfortable saying in person, they may be willing to share with you online, if given the chance. Making “no-judgment” spaces, or signing teacher-student confidentiality agreements (that still allow you to get the proper authorities involved, if necessary) could help create this safe space.
With this, we must also teach them responsibility in posting, and to be aware of context. Just like others may not understand the context of what they share, they also don’t have the full story from a single tweet. Instead, teaching students to look for repeated behaviors before calling someone out – and then showing them the difference between constructive criticism to help them understand what they did wrong so that they can do better, and the gleeful, destructive tendencies that are common in our society. Addressing empathy as part of teaching online identity is intrinsic. We can’t assume students have been taught empathy, no matter how old they are, nor that they understood it the first time they learned about it.
On the topic of digital identities, this week in class we did “background searches” of each other – something many of us have done on ourselves or on someone we just met and wanted to know more about. However, I was still shocked at how much a simple name search in Google can bring up – the first page and a half of results were exclusively about Celine, and this barely even scratches the surface of what’s out there, yet already provides a pretty comprehensive view of her life. You can find out everything from where someone went to school, who they were (and are) friends with, what their pass-times are, and what they want to do as a career. I found out that Celine has started her own photography website, where she grew up, where she’s done her last three internships, what sports she played, and which clubs she was a part of in middle and high school, and so much more. Before the internet, I would’ve had to get to know Celine and spend hours with her to learn all of this information. And somehow, this is still only a snapshot – it is only what she has willingly shared about her life (that filtered view that is so dangerous when taken out of context). And even with this search, I had to constantly be looking out for fake accounts, or people with the same name. While I was able to verify Celine’s accounts pretty easily since I know her beyond social media, there is always the danger of catfishers and/or hackers taking control of her (or my own) identity, and flooding the search results with things that have nothing to do with her, and that she doesn’t want to be tied to her name.
This makes digital identity all the more complicated. How do we tell what is real if we don’t personally know someone? How do we know which comments to accept and which to reject? Tying back into teaching empathy and digital literacy with students, we need to make them aware of how these phony accounts can make creating a positive digital identity increasingly hard, and how this impacts the person being impersonated. Along with this, we need to make sure that we are not blaming them for another’s actions, even if they were done in their name.
Digital identity has many benefits, but is also a danger with many heads. We must learn to be and teach our students to be digitally literate in order to navigate these issues so that they can still reap the benefits of being online.
This video would be a good introduction to digital identity in the classroom:
I spent the majority of this week working on finishing my painting of the buffalo rock, which I decided to start a few weeks ago. I decided I wanted to focus my efforts on this painting, rather than starting a new one, as there were several different things I had to learn to move forward on this one. I had said in this post that I would make my grass in this painting more like Chuck Black’s, however, when I tried to go this detailed in a portion of my painting, it just didn’t look quite right. To fix this, I decided to go in between his example and “painting masses, not grasses,” and instead painted lots of individual small masses. I used small, short strokes further in the back, then made them longer the closer they got to the foreground. I made them slant slightly to the right to indicate the wind that is blowing in the storm, and then went back over with a super tiny brush to add in the flowers and prairie sage. I think this achieved the overall look I was going for, though it was very time-consuming. I ended up using a similar technique for painting the closer bison in order to get the texture of his fur, following this explanation:
I loved how many different ways he described to paint different textures, and the idea of using different tools, such as styrofoam and aluminum foil rather than only brushes. It would be fun to explore some of these techniques in the coming weeks.
I also used this site to help me paint the rocks. I wanted the majority of the rocks to fade into the landscape so that the buffalo rub rock would be the focus. I’m very pleased with how they turned out, but I would make one or two of them stand out a little more if I were to do it again. I could do this by making their colours more stand-outish, by making their shape more angular and eye-drawing, by changing their size, or all of the above. However, I think that they worked for the overall feel of the painting.
Trying to branch out in where I get my sources, I found some people on Twitter who post painting tutorials regularly and even do live demonstrations. I shouldn’t have been surprised after seeing how large the Twitter education community is, but I still was when I saw how big the art, specifically painting community was! There are a lot of useful resources and contacts to make if you want to join that community. I started following @angelafineart and @Artsherpa though, if you’re looking for a place to get started.
I wanted to find another new way to document my learning this week, and found the idea of making a gif using Gif-Maker on Annissa’s blog. It was super simple to use. All I had to do was select the files I wanted, make any changes (such as frame duration, adding text, etc.), hit “create GIF,” and then download. It would be a fun, simple way for students to document their progress on larger projects.
It’s also great because you don’t have to upload it to YouTube before you can post it in your blog, which makes things a lot easier. Here’s my progress for this week:
As you can see, I used initial paper drawings of the buffalo before adding them in to my painting. This was to make sure that their placing and size worked, and allowed me to make some changes prior to painting them, making it much easier to fix.
As always, if you have any questions, tips, or suggestions, feel free to let me know in the comments. I hope to hear from you!
There’s a lot of debate about how much or how little one should say online. Do you really need to post that picture? Should you really say that?
Should we be taking stances on social justice issues?
This question becomes even more important for educators: are we responsible for modelling “active citizenship and anti-oppressive education in digital spaces”? Or is that better left for at home?
Then, saying we do choose to take an active stance, what are the risks involved? Do they outweigh the benefits of speaking out?
Or, could I lose my job, or my potential for getting hired?
All of these questions are important to answer. However, the answers are also constantly changing. Just a few years ago, teachers would have been applauded for staying neutral on these issues and were likely required to or risk losing their job. Moreover, most of these issues would be covered strictly by the media, with little to no options for “regular people” to have a say, making these discussions rather one-sided. The only way you could see both sides was to actually be there physically. You couldn’t fight for a cause without actually being there.
Today, however, when everyone is hyper-connected with multiple platforms to share their thoughts with more people than ever before, people are speaking out against people not using their social-media standing to support these crucial causes. Where just a few years ago silence was the status quo, now speaking up is. Some refuse, however, even after multiple attempts to reach out at them, and continue as if nothing has changed, leading to outraged followers and a lost chance to make a difference.
I think this situation could be used as an example of one of the risks of staying silent and the issue of not being willing to learn from those around you. As an educator, one must constantly be evaluating and re-evaluating our stance on issues like this one, taking constructive criticism from others and using it to help shape our views and practices moving forward. We cannot choose to ignore these issues, nor can we take a “neutral” stance – doing so takes the side of the oppressor and shows our students that “these issues are not important.”
“In preparing democratic citizens, teachers play a key role in facilitating classroom discussions of social and ethical issues. In the many minute and seemingly mundane choices that teachers make when they facilitate such discussions (e.g., deciding which issues to recognize as social or ethical and worthy of class time), they enact at least a partial vision of social justice (or injustice)…Learning how to discuss and debate these emotionally charged and messy issues is a crucial first step toward working with others to solve collective problems. The tensions and dilemmas that this facilitation role can produce for even the most experienced educator are felt even more keenly by beginning teachers…Because they are continuously observed and evaluated as student teachers, they often can find it particularly stressful to facilitate open-ended discussions of social and ethical issues. They may come, mistakenly in our view, to think that they can remain above the fray and either be neutral purveyors of “facts” or referees of competing perspectives — or at least strive for what we will call “teacher neutrality” as an ideal.”
The fact of the matter is, our students will be exposed to these issues whether we discuss them with them or not. It is our responsibility as teachers to make sure that students have all the facts so that they can make informed decisions. With all the fake news and hate speech that is so easily accessible, we need to help our students sift through this overload of information so that they can learn to find the facts and what is real. But we also need to facilitate discussions with them, so that they can talk through their concerns and ideas in a safe place – which doesn’t just have to be in the classroom.
“As teachers, we know that if misbehaviour isn’t addressed, students will quickly learn that the behaviour is acceptable. The same goes for the false or hateful content that kids find in the digital world. If no one speaks up, children will have no reason to question the hurtful things that they see – and no reason not to join in. When it comes to social justice issues, silence is complicity.”
Posting information about important social issues online makes them more accessible to our students so that even when we are not physically with them, we can still be providing them with quality information.
Sometimes there’s the fear of saying something wrong, which is why we choose to stay silent. But how can we learn if we don’t make mistakes? Isn’t that what we tell our students? This is where I say be actively silent. Take a day or two to educate yourself. Read articles by people who are prominent leaders in the issue. Talk to people – again, prominent people fighting for the cause, as well as other educators. Gather the information you need, but don’t stay silent forever. Use what you have learned to join in or start your own discussions. Will you mess up? Possibly. But you will learn from those mistakes and can also make a difference. You can be a voice for those who may not be able to get online and share their thoughts. Being brave is important in every aspect of teaching.
That said, it can be scary to think of getting involved in some of these discussions, especially as pre-service teachers who are starting to look for potential jobs, where getting involved could mean losing a job opportunity. But do we really want to work in a school where complacency is the norm and silence is expected? What message does that send to our students? Instead, we should be engaging with these issues as much as possible, not allowing ourselves to remain silent. A job is not more important than a life. And the right job will come along where you don’t have to be complacent or silent, where you can teach students how to be responsible, social justice advocates by first setting the example.
 I particularly enjoyed the chats, as I was able to connect with other educators and have some of my questions about teaching answered. I did have some problems joining them initially, mostly due to miscalculating the time, but I was eventually able to participate in several different chats throughout the semester. I found a couple of chats that I especially enjoyed, such as #EdAdventures lead by @sydneykoch_. This chat had the goal of connecting novice and veteran teachers, which really contributed to the content that was able to be shared. I was able to connect with numerous teachers from all around the world through this chat. I also really enjoyed the #822chat and #tlap chats, though I wasn’t able to join as often (due to them finishing for the summer or taking a few weeks off). I look forward to being able to join the #saskedchat now that class is no longer happening at the same time.
 I used Twitter a lot to share the resources I found and articles I read that were relevant to education in general or to what we were learning in class. I hope to be able to return to my tweets (and that others can as well) when I need inspiration for lesson plans, assessment strategies, field trip ideas, and for everything else I posted about. I also made an effort to reply to at least two of my classmate’s (or other’s) tweets per day, though I often read a lot more than those two. If anyone responded to one of my tweets, I would reply, trying to further the discussion.


 including this


 philosophy, we are
 individual small masses. I used small, short strokes further in the back, then made them longer the closer they got to the foreground. I made them slant slightly to the right to indicate the wind that is blowing in the storm, and then went back over with a super tiny brush to add in the flowers and prairie sage. I think this achieved the overall look I was going for, though it was very time-consuming. I ended up using a similar technique for painting the closer bison in order to get the texture of his fur, following this explanation:


